
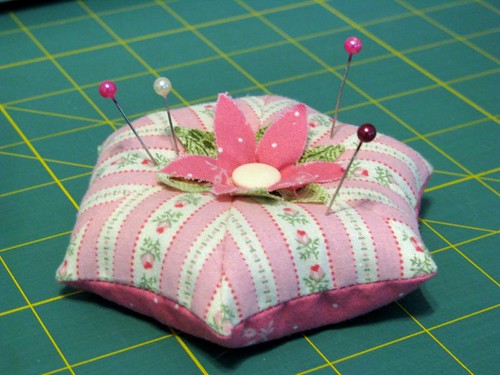
Triangles cut from striped fabric can be used for lots of cool piecing effects, like setting the stripes to make concentric shapes or to radiate from a central point, as in this version of my hexagon pincushion. With a little care, this is pretty easy to do using an AccuQuilt Go triangle die—I’m again using the trusty Equilateral Triangles die they sent me, but this method could be adapted to any die for half-square triangles, isosceles triangles, or what-hast-thou.
Definitely start by watching Ebony Love’s video series (part 1, part 2, and part 3) on marking AccuQuilt dies. She gives a very thorough explanation of how she marks her dies not only to make the blades easier to see but also to help with fabric placement. Per her recommendation, I used a silver Sharpie pen to mark up my die; other opaque, light-colored permanent markers could work too.
This tute covers marking the Equilateral Triangles to cut the radiating stripes I used for the pink hexagon pincushion—you’ll want to change the position and direction of your guide markings if you’re going for a different effect.
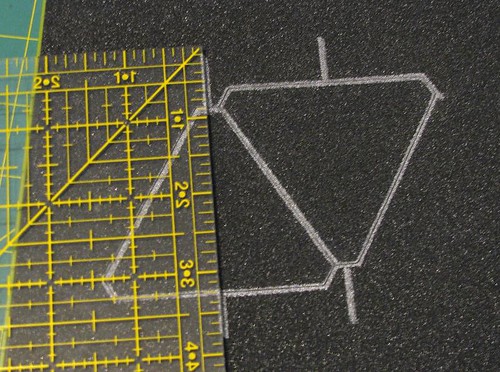
- Start by tracing the blades of the die with your marker. The thickness of the marker line is greater than that of the blade, so if you’ve covered all the marker lines with fabric you want to cut, you’ll know the shape will be cut completely.

- Find the vertical center of your triangle to mark guide lines. The long edges of the biggest Equilateral Triangle on the die is 2½", so measure in 1¼" from the corner and mark at a right angle to the blade. You can continue this line through the shape to extend past the opposite point, or you can just mark outside the shape like I’ve done; in any case, extend the guide lines ½–¾" past the edges of the shape.
 The Equilateral Triangles die cuts 2-up of each size triangle and I did mark both of my big triangles, but unless your particular stripe is the cosmic soulmate of your die, you probably won’t be able to cut two triangles side by side with the same stripe placement, so you really only need to mark the one triangle you’ll use for stripe cutting.
 - Rotary cut strips of fabric. To maintain accuracy, I used 2 strips of fabric, each cut at 3×9", to get my 6 triangles. This gives a comfortable margin to ensure you get 3 full triangles from each strip, with stripes in the same position on each. Make sure the stripe you want in the center of your triangles is in the center of the strip (i.e., under the 1½" mark on your ruler).
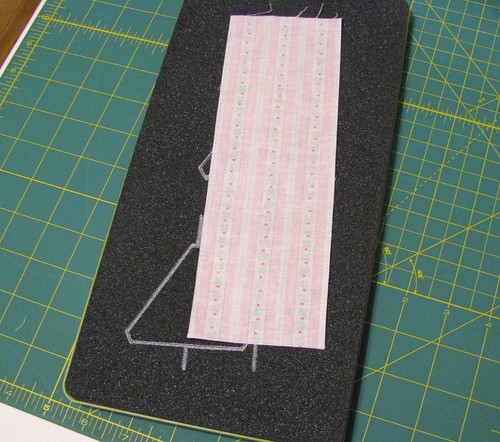
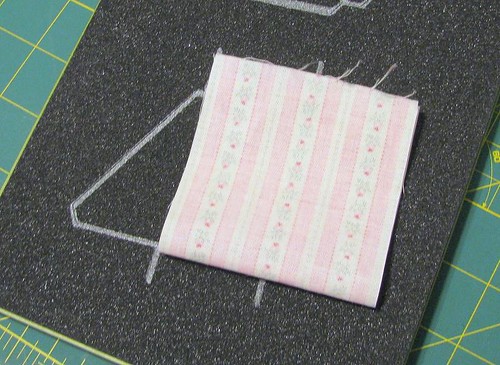
- Place one fabric strip on the die, just covering the marked-up shape at one end of the strip. Center the central stripe on the guide line you marked:
- Fold the strip down to cover the die shape again, making sure the central stripe is centered on the guide line at the fold. Try not to shift the lowest layer of fabric out of place—the central stripe should always be centered on the guide lines.
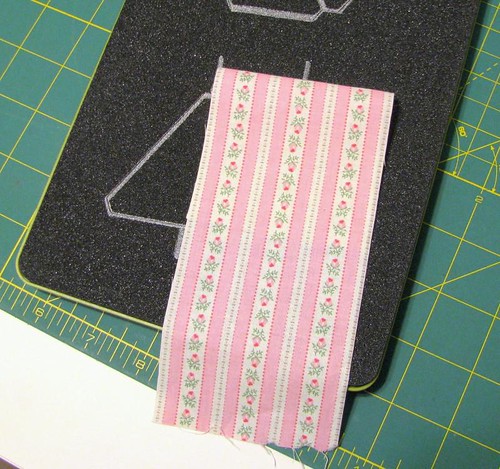
- Fold the strip back up again. The die shape should be covered 3 times now, and you should be able to see that both guide lines are centered on the central stripe.
- Carefully place the cutting pad over the die and fabric—don’t disturb your careful fabric placement! Then roll it through the die cutter as usual. Repeat from step 4 for the remaining fabric strip, and you should have 6 triangles with stripes running straight up from base to point.
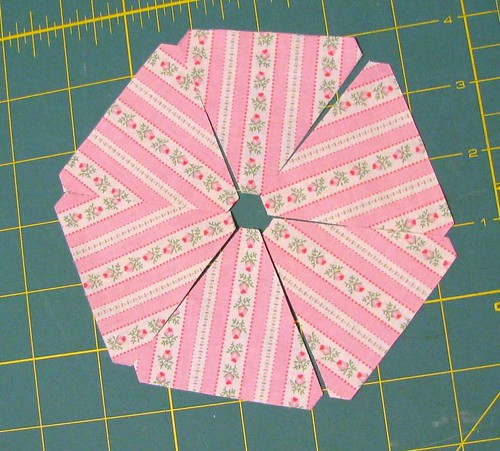
You may notice that my stripes aren’t exactly lined up. I’m going to look for a finer-point Sharpie to make more precise guide lines; for my purposes, the stripes met each other well enough at the seams, and where they meet at the center is covered with a button and flowers anyway.
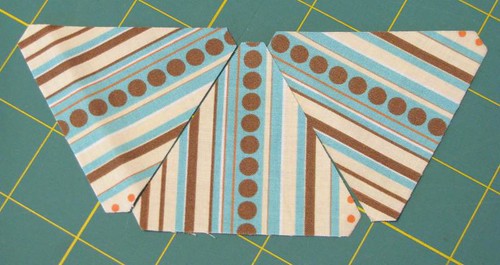
Before you get cutting, though, a note about the anatomy of stripes: the pink floral stripe I used was symmetrical, so folding the fabric back and forth resulted in essentially the same configuration of stripes in the finished triangles. If the stripes aren’t symmetrical, one of the three triangles will be upside down compared to the other two:

The upside-down triangle results in stripes that are a mirror image of the others. This stripe almost looks symmetrical, but compare the blue and brown stripes to either side of the center dotted stripe—they’re not quite the same. Arranged willy-nilly, the stripes won’t line up properly:
But they will join up neatly at the seams if you alternate the placement of the normal stripes and the mirrored stripes:
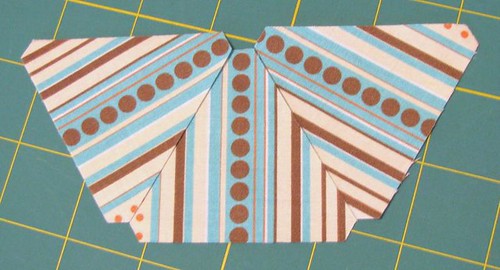
Much better, eh? This’ll work for the whole hexagon as long as you arrange and fold the second fabric strip opposite to the first so you have an equal number of normal stripes and mirrored stripes, and continue alternating mirror vs. normal.
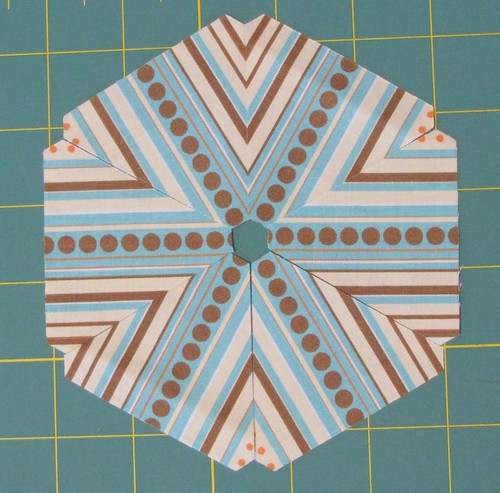
At first I didn’t think these asymmetric stripes would work at all with this technique, so I was pleasantly surprised when I worked out how to do it. I’m thinking this will make a pretty snazzy pincushion—maybe edged with some brown ball trim?
No comments:
Post a Comment